Friday, June 29, 2012

Fantastic Designer Friday with Andrea Reese

Hi everyone, hope you guys are having a fantastic Friday!  It's Andrea, from the LSG Design Team, with a Fantastic Designer Friday project.  The 4th of July is quickly approaching and I adore decorating for this fun summer holiday.  I am the self-proclaimed "Nesting Box Queen," so I had to create a set that displayed my love for the USA.  

The nesting boxes start out looking like this, just basic paper mache.  I don't prime or paint the boxes before spraying them with LSG sprays, as I like the kraft color to peek through here and there.

I started by painting my boxes with LSG Starburst Sprays.  I love how versatile LSG sprays are.  You can spray with them or take off the lid and dip in a paintbrush and paint with them.  I chose to paint my boxes.

This box was painted using "Afternoon Delight Denim."  I paint the box and then rub it in with a paper towel (the paper mache soaks up the color better this way).

I painted the middle box using "Rizzo's Rowdy Red" (in the new Flat Fabio set being released July 15th).

The top box was painted with a coat of white acrylic paint and then sprayed with Scintillating Silver.

I love to add a touch of stamping to one of my boxes, so I decided to use some LSG Two-Toned Embossing Powder to really give my stamping a special touch.  I started out by gathering different star stamps from several stamps sets.  I like to rub my nesting box with my embossing buddy before stamping my image with VersaMark ink.  I then sprinkled on some "Midnight Bronze Obsidian Embossing Powder" and set with my heat gun.

And here's how it turned out...

I added some trim and a few more embellishments to accent the boxes.


I enjoyed sharing this project with you today and be sure to check back next week to see what gorgeous project our next designer has up their sleeve. Hope everyone has a great weekend!

Lindy's Stamp Gang Products Used:

Tuesday, June 26, 2012

Technique Tuesday with Cynthialoowho♥

Junk Journal Backgrounds
Here are a couple easy ways to make Junk Journal pages.

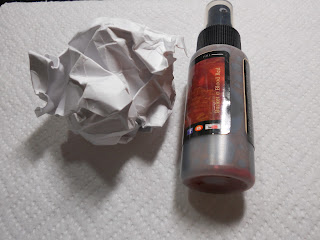
First start by crumpling a piece of white cardstock.
Spray all sides with your favorite Lindy's Stamp Gang Spray.
Flatten out your cardstock, pick your favorite side and use a craft iron to iron flat.

Once your image is flat rub with a dark colored ink pad

Here is the finished paper ready for some mixed media and journaling!

For the second technique I used Black card stock and twisted it.
Spray all sides with your favorite Glitz Spritz. I used Royal Lapis Lazuli.
Pick your favorite side and iron flat. Rub your cardstock with VersaMark.

Heat emboss
Now it's ready for some mixed media and journaling!
I hope you like these techniques and thanks for stopping by for another
"Technique Tuesday with Cynthialoowho♥


Friday, June 22, 2012

Fantastic Designer Friday with Tresa Black

Hi! Tresa here from the LSG design team. Here in my corner of the USA, we’ve had a late start to our summer. After a few weeks of rain, the sunshine is out and the plants are growing like crazy. We’ve got these monster bushes in our yard that refuse to be tamed.

DSC_1036

They’re in a need of a trim, but I think I’ll let my husband take care of that. I did my part… I snipped a leaf cluster for my LSG designer project.

DSC_1027-001

The leaves are relatively flat, and the branch is very flexible, so I knew they’d be perfect to use as a mask for Lindy’s sprays.

DSC_1031

I placed the leaves on white cardstock and sprayed over them with Magical Mai Tai Flat Fabio. I made sure to apply the spray from the same angle, almost directly overhead. This will give the clearest impression and prevent under-spray.

DSC_1032

You can see from the photo above how the leaves are acting as a mask, but since the edges of the leaf are not flat against the cardstock, the line will be softer, not hard edged. This is perfect for a nature themed accent.

DSC_1021-002

If your cardstock begins to curl while spraying, you may want to use something to hold it flat. This will prevent the leaf from shifting. I’m using the end of a paintbrush. Keeps my fingers out of the spray. Don’t want a hand-shaped mask!

DSC_1035

Be patient and build your color slowly. The leaves will resist the spray and you’ll see the liquid begin to pool. You can let them air dry or blot gently with a tissue, being careful not to dislodge a flood of color onto your cardstock. Wait until the leaves are dry before lifting them from the cardstock.

Once your custom made creation is dry, it’s ready to use!

LSG blog card

Lindy’s Stamp Gang products used:
Magical Mai Tai Flat Fabio spray
T-Bird Turquoise Flat Fabio spray

Saturday, June 16, 2012

New Flat Fabio Set!


The perfect summer collection.
With Summer Lovin' Sunshine, T-bird Turquoise, Kissin' Kenickie Coral, Frenchy's Pink Pouf, & Pink Ladies Pink, you have the perfect combination for any summer project as well as year round.
If you love our Flat Fabio line this is a must have set..

Tuesday, June 12, 2012

Technique Tuesday with Cynthialoowho♥

Here is an easy way to make beautiful flowers to match any project!
Start with some Mulberry Flower petals, a variety of Flat Fabios, Starbursts, or Moon Shadows, glitter glue, and a center embellishment.

I sprayed all the petals with Clam Bake Beige and while moist I colored the tips and edges with Caribbean Blue, Pineapple Paradise, Magical Mai Tai, and Plumeria Pink Flat Fabios.

Glue layers of petals together alternating petals. Finish off with some matching embellishments for the center and kiss the ends of the petals with a matching glitter glue.

Thank you for stopping by for another
"Technique Tuesday with Cynthialoowho♥"


Thursday, June 7, 2012

FDF: This is Paradise Canvas Layout with Bona


Happy Friday Everyone!
I'm excited to share my canvas layout I created for Fantastic Designer Friday. I love the new canvas sheets I had purchased and wanted to create a fun layout of my sister, cousin and their friends from Hawaii. I'm loving the new Echo Park Paradise Beach collection and thought how perfect this would go with the new Flat Fabio Hawaiian Island Set.

For the top of my layout, I wanted to add several clouds. I prepunched three different sizes of clouds with my favorite Fiskars Cloud Punches and placed them where I wanted the clouds to be. I added some repositional tape to the back to keep the clouds from shifting. I then sprayed Blue Hawaiian Blue and love how it turned out. Behind the photo, I created several banners and layered them on top of one of the coordinating die cuts from the collection. I then, die cut all the Hawaiian Islands using one my new favorite QuicKutz Hawaii die.

I fussy cut out the gorgeous "This Is Paradise" image from the design paper and placed it on the side of the photo. I loved how this image had palm trees, Hibiscus flowers and a wave. I added some I Am Roses petals and cut a half circle on the tips to create a Hibiscus flower. I sprayed each of the flowers with Plumeria Pink, Magical Mai Tai, Hibiscus Rose and added some two toned light blue cherry blossoms.

For the bottom the photo I mixed some Snow-Tex with some Magicals in Clam Bake Beige to give the look of the sand from the Hawaiian beach. To complete my layout I added an adorable Van die cut using my QuicKutz Van die. I really enjoyed creating this layout and look forward to sharing with you another Fantastic Designer Friday.

Tuesday, June 5, 2012

"Technique Tuesday with Cynthialoowho♥"

Staying with last weeks theme, you can color your seam binding easily with Lindy's Stamp Gang's Flat Fabio's sets too!
Using the same Hawaiian Island set I just sprayed my seam binding sporadically and you can let air dry or crinkle and heat dry with your heat gun!


What a beautiful Tropical look for any trim!

Thanks for stopping by for another
"Technique Tuesday with Cynthialoowho♥"